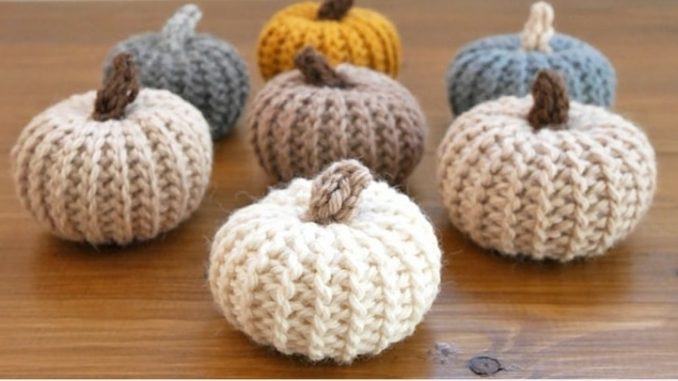
Fall is just around the corner and since I can remember, pumpkins in all shapes and forms are the main theme in any fall decorations. With that in mind, I decided to add my little stone to this madness with my crochet pumpkins!
But not just any crochet pumpkins. They look like they are knitted but they are not! Yes, that pictures you see are actually crocheted pumpkins. I find it very intriguing to try and replicate knit stitches in crochet and have done so in other patterns of mine.
These crochet pumpkins are small -approximately 3 inches wide and 2 inches high- but they are easily customizable and you can make a bunch in no time to decorate your Halloween table or spread them around the house. I am offering more instructions in a pdf form in my Etsy, Ravelry, and Love crochet shop for you to make these crochet pumpkins with just about any yarn, even a nice, huge bulky!
Here you can find two different patterns for pumpkins that look knitted but aren’t. The one is called the “knit pumpkin because the stitches look like the knit stitch and the other one is called the “purl pumpkin” because the stitches look like a purl in knitting. Very imaginative, huh? I know… I am that great in picking up names!
NOTES:
- The front loops are the ones that are closer to you when you are working any row. The back loops are the ones that they are further from you in any given row. Try to remember that as you turn your work in every row.
- The back bumps of the initial chain are located on the back side of the chain. They look like a backbone.
- The pattern is very easy to follow but keep in mind to work loosely those slip stitches.
UPDATE 18/10/2017: A very nice and talented young man called El Principe del Crochet, asked my permission to make a crochet tutorial for my pumpkins on his youtube channel. It is in Spanish but he made such a great job that you watch it even if you don’t speak the language.
ADORABLE CROCHET PUMPKINS
THE “KNIT” CROCHET PUMPKIN
Before you begin, leave a long tail of yarn, about 6 inches (15 cm). This will be useful in sewing your pumpkin.
R1: ch 15, sl st in back bumps only, ch 1, turn (14)
R2: sl st in blo in each st across, ch 1, turn (14)
R3-35: repear row 2
Do not fasten off. See instructions below for the assembly.
ASSEMBLY INSTRUCTIONS
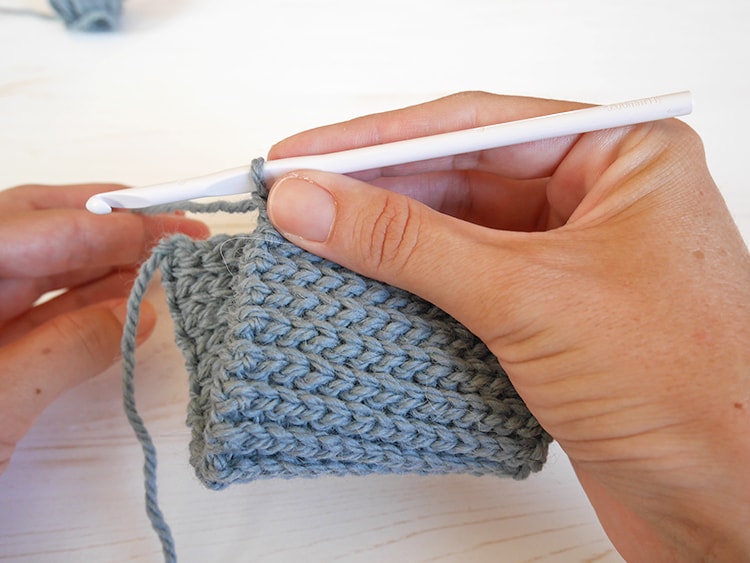
When you make the last row, chain 1 and fold the piece in half like in the photo below. This is the wrong side of your work, you will turn it inside out, eventually.
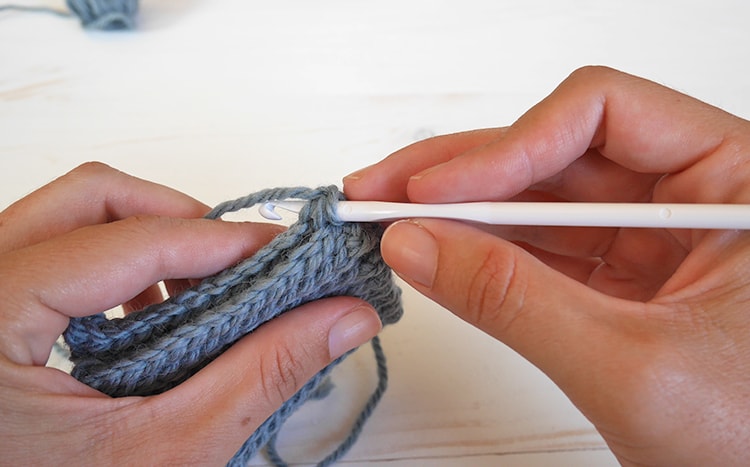
Turn your work so that the yarn tail you left in the beginning is in front of you. Insert hook in the back loop of one side of the fabric and the front loop of the other side of the fabric. Yarn over and pull through all loops on your hook.
Continue in the same manner all the way across. It will look like this.
When you reach the end of the row, leave a long tail of yarn for sewing and cut the rest. Turn your work inside out and thread the needle. Begin sewing the bottom of the pumpkin. Down in one stitch…
up in the other stitch. Continue all the way around.
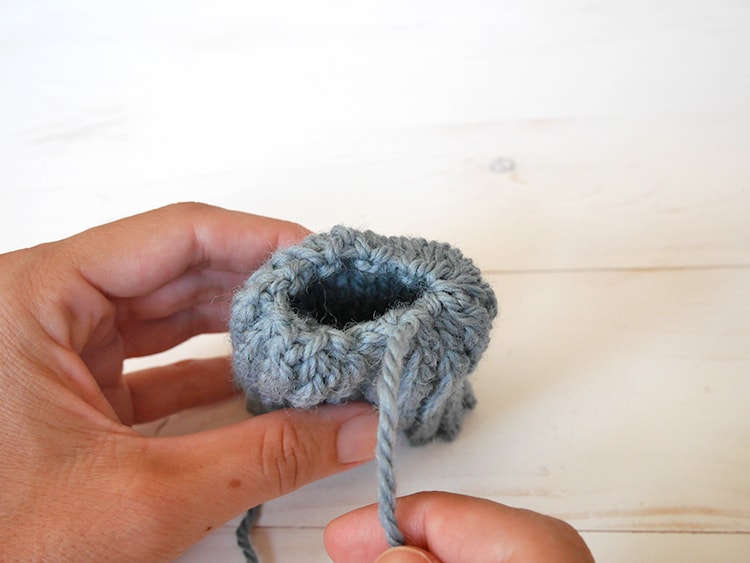
Start pulling the yarn to close the hole.
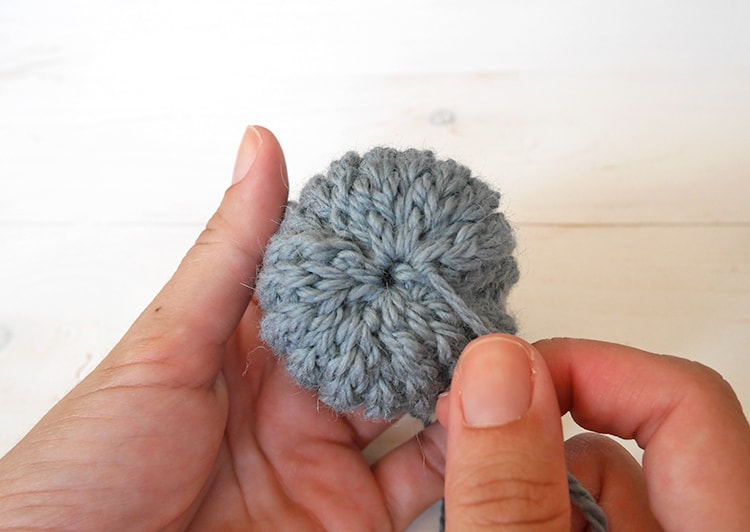
Close the hole all the way through by pulling tight.
Insert the needle like so and keep pulling. I like to go one full round of this and then make a knot and hide the yarn again in the same manner.
Stuff the pumpkin and sew the upper side of the pumpkin in the same manner as the bottom side and start pulling tight. Before you close the opening completely make sure you have put enough stuffing.
Close the opening in the same way as before and pull tight. Do not cut the yarn yet.
Insert the needle in the middle of the hole.
And push it all the way to the middle of the other side.
Pull the yarn tight so the upper center of the pumpkin will curve inwards. Insert the needle under the closing loops again and repeat the same procedure in the other way around, from the bottom up and keep repeating until you are satisfied with the result.
THE “PURL” CROCHET PUMPKIN
Before you begin, leave a long tail of yarn, about 6 inches (15 cm). This will be useful in sewing your pumpkin.
R1: ch 15, sl st in back bumps only, ch 1, turn (14)
R2: sl in flo in each st across, ch 1, turn (14)
R3: sl st in blo in each st across, ch 1, turn (14)
R4-35: repeat rows 2 and 3
Do not fasten off. See instructions above for the assembly. This one is finished in the same way.
THE STEM
With 5 mm crochet hook make an icord of only 3-4 rows and fasten off. Attach on the top of your pumpkin. If you don’t know how to make an icord I have a photo tutorial for you below.
ICORD TUTORIAL
1. Chain 3.
2. Insert hook into the second chain from hook, yarn over and pull up a loop.
3. Insert hook into the next chain, yarn over and pull up a loop. You now have 3 loops on your hook
4. Remove the last 2 loops from your hook carefully and hold them with your left thumb and index finger. Yarn over and pull up a loop.
5. Slide one loop on your hook again, yarn over and pull up a loop. Remember to hold the other one tight.
6. Slide the last loop on your hook, yarn over and pull up a loop.
You have completed your first icord row. Repeat steps 4-6 for the desired length.
When you reach the desired length for the stem, you have 3 loops on your hook. Yarn over and pull through all three loops on your hook. Cut the yarn and pull it so it won’t unravel. Thread the needle with the yarn that you just cut off and sew the stem on the pumpkin.
That’s it! Wasn’t that easy? If you make any pumpkins with my pattern tag me @mallooknitwear on Instagram and use #malloomakers so I can see your projects!
GET THE CROCHET PUMPKIN PATTERN HERE:
source:HOW TO MAKE ADORABLE CROCHET PUMPKINS THAT LOOK KNIT

Leave a Reply